
THE SIXPLANETS BLOG
Custom heavyweight t-shirts for a creator merch drop
Plan custom heavyweight t shirts for your creator merch drop. Confirm the blank, approve the proof, and sample first with no minimums and free Frisco pickup.
By sixplanets · Published · Updated About 13 min read
In this guide
Creator merch printing is custom apparel production with the aim of turning your designs into wearable merchandise for your audience. For custom heavyweight t shirts, choose the blank, fit and print placement before committing to a run; Sixplanets offers no-minimum custom DTF printing, so you can start with one shirt while confirming the garment details for your 2026 drop.
TL;DR- For custom heavyweight t shirts, confirm the blank model and fabric weight before approving your creator merch order.
- Sixplanets custom DTF printing suits creators who want no minimums, artwork proof approval and free Frisco pickup.
- Order one sample to judge fit and print placement before committing to a larger merch run.
- Production takes 5–7 business days after proof approval; shipping transit is additional.
Why custom merch matters for creators
A creator merch drop has to represent your work without forcing you into a larger order than you want. Your audience recognizes the artwork, but the buyer also has to choose a size, understand the fit and decide whether the shirt belongs in their wardrobe. A strong graphic does not answer those questions by itself.
Heavyweight describes the garment, not the printing method. Ask for the exact blank model and its stated fabric weight rather than treating the word as a complete specification. Do not assume heavyweight also means oversized, boxy or suitable for every season.
Sixplanets custom DTF printing is best for creators who want no-minimum merch orders with Frisco pickup. The studio offers premium blanks, design previews, final artwork proof approval and hand inspection. Confirm the heavyweight blank for your project before ordering; those service features do not replace checking the garment itself.
For a 2026 release, your next move is to write a short order brief. It should tell the printer what you want and give you a consistent reference for checking the finished shirt.
How to plan your heavyweight creator merch drop
Define the shirt your audience will actually wear
Start with a written brief, not a collection of unrelated reference images. Name the design, describe the fit you want and explain where buyers will wear the shirt. A gig shirt, an illustration-led release and everyday creator merch can use different layouts without needing a different brand identity.
Keep the first release focused. If you introduce several designs, garment colors and fits together, you have more decisions to check and more combinations to track. A narrower brief makes it easier to understand whether the finished shirt matches your original intention.
For your 2026 brief, separate requirements from preferences. An approved graphic is a requirement; an alternative garment color is a preference until you confirm it. This distinction prevents an acceptable substitution from becoming an accidental redesign.
Finish the brief with these concrete decisions:
- Identify the artwork file and the exact design version.
- Describe the intended fit without relying on the word heavyweight.
- Choose the garment color you want to assess first.
- State whether the order is a sample or a release run.
- Record the date you need the finished order in hand.
Check the blank before choosing print placement
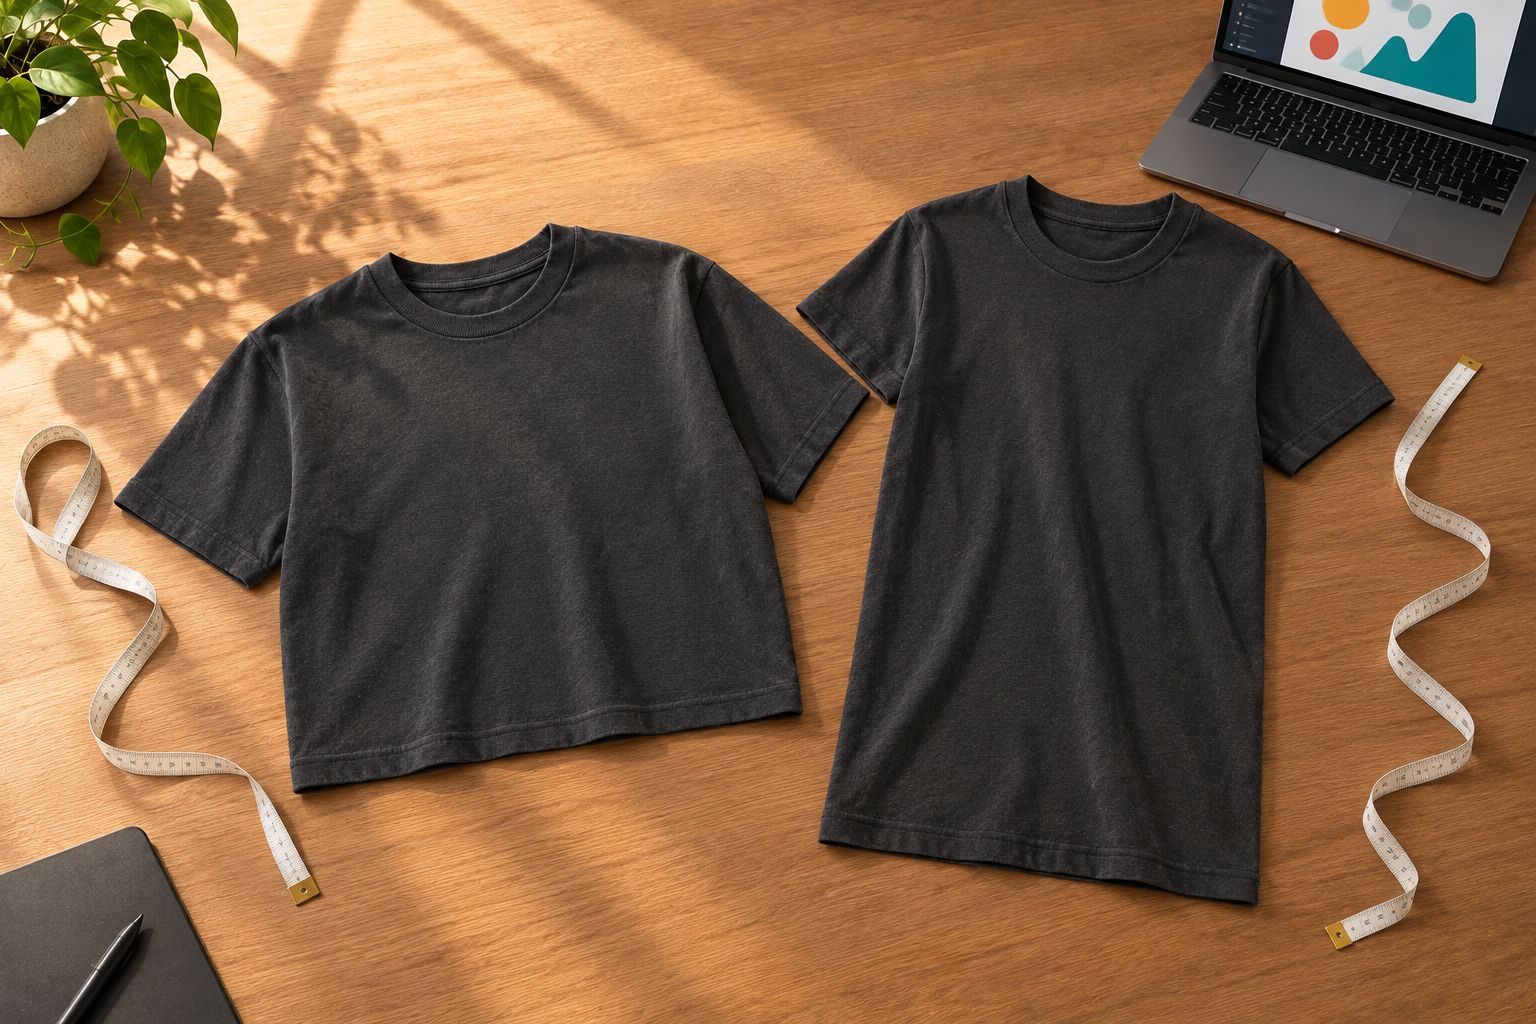
Use the blank's specification and size chart as your starting point. Ask for the model name, fabric composition, stated weight and garment measurements. These details describe what you are ordering more precisely than a lifestyle photo or a broad premium label.
Weight and fit are separate decisions. A heavier fabric does not tell you the body length, sleeve shape or chest width. Compare the proposed measurements with a shirt you already like, using the same measurement method as the size chart.
The heavyweight t-shirt fit and print placement guide is a useful next reference when you are deciding where the graphic belongs. Choose the garment first. Then evaluate the artwork on that garment rather than expecting the blank to rescue a layout designed for something else.
Before you move to artwork, check these garment details:
- Request the exact blank model rather than a category name.
- Read the stated fabric weight and composition.
- Compare chest width and body length with your reference shirt.
- Check the proposed size chart before collecting buyer sizes.
- Confirm that the selected blank matches your order brief.
Prepare artwork that makes the print decision clear
Open the artwork yourself before sending it. Check spelling, remove anything that should not print and make sure the file contains the intended version. A preview is easier to evaluate when the source artwork is already settled.
Describe placement in plain language: front chest, centered front or back. Then ask for the intended print dimensions and placement to appear in the proof. A graphic that looks balanced on a cropped screen image still needs to be checked against the actual shirt.
Sixplanets offers help with artwork and larger projects. Use that help when you need clarification, but keep final design decisions explicit. Assistance is not a substitute for your approval, and a design preview is not a physical sample of the fabric or printed surface.
Make your artwork handoff specific:
- Send the final artwork version and identify it clearly.
- Check spelling, dates and any text within the design.
- Explain which background areas should remain unprinted.
- Name each requested print location.
- Ask for file requirements before exporting replacement artwork.
- Review the requested print dimensions in the proof.
Order one sample before committing to the run
You can make the initial checks yourself with a size chart, your reference shirt and the design preview. A physical sample adds a different check: you can wear the garment and see the actual artwork placement. Order just one when you need to resolve a fit or design question before a larger order.
No minimums let you take that smaller step. The limitation is timing: a sample stage is a separate decision before the release run, not a shortcut around production. Build it into your 2026 schedule rather than ordering a sample on the date you need the full drop finished.
Inspect the shirt against your brief. If you want to change the blank, placement or artwork, document the change and review the revised proof before printing the next order. Do not assume an informal comment updates the approved specification.
Use the sample to answer these questions:
- Does the shirt fit the way you intend to describe it?
- Is the graphic positioned where you expected?
- Does the printed design match the approved artwork?
- Are small text and important details readable?
- What must change before the release order?
Collect sizes without guessing your audience's mix
Start with direct size requests when you can. For a creator community, that can mean asking confirmed buyers to choose from the size chart for the selected blank. Keep expressions of interest separate from actual order instructions so a casual response does not become a garment you never intended to buy.
If you plan to hold stock for an event, record that as a deliberate choice rather than calling it confirmed demand. There is no universal size mix that follows from choosing heavyweight fabric. Your own buyer information is a better basis for deciding quantities.
Use a simple spreadsheet with one row per garment variation. Record the design, color, size and quantity together; otherwise, a correct total can still contain the wrong combination of shirts. Check the sheet again after any change to the blank or artwork.
Before submitting quantities:
- Share the selected blank's size chart with buyers.
- Separate confirmed requests from unconfirmed interest.
- Record each design, color and size combination.
- Mark any event stock as an intentional extra order.
- Reconcile the garment total with your final order brief.
Approve the proof before scheduling production
Treat the proof as the last design checkpoint, not an administrative message to answer quickly. Review the artwork, spelling, garment choice, placement and stated print dimensions. If anything is unclear, resolve it before giving final approval.
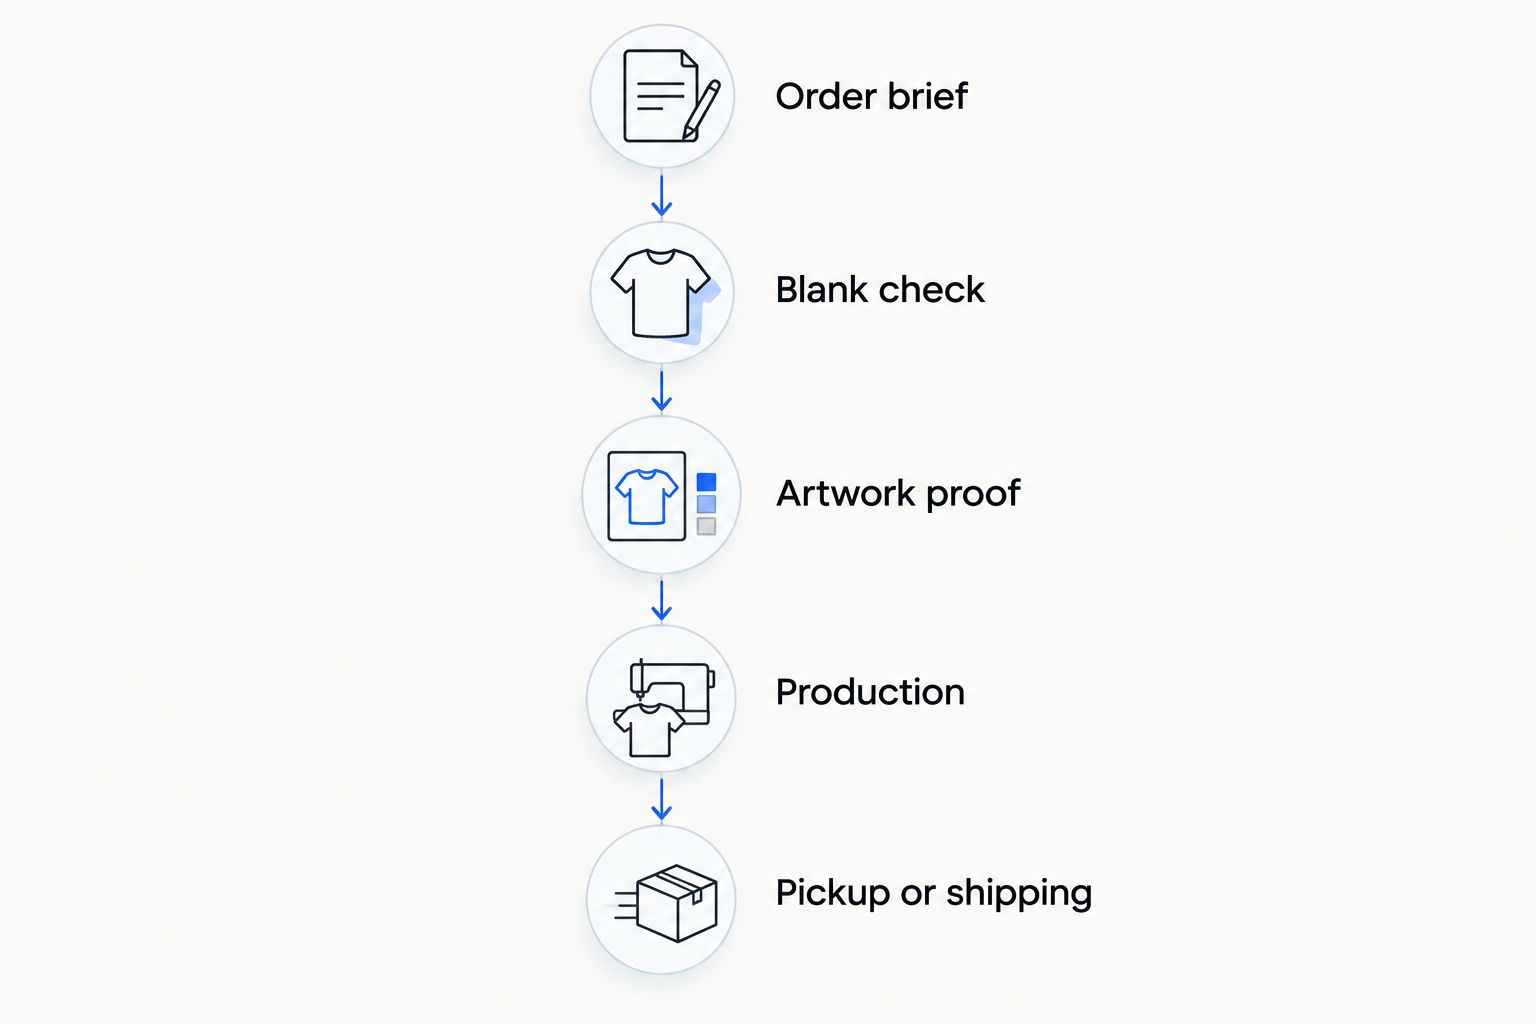
The order sequence is Order brief, Blank check, Artwork proof, Production, Pickup or shipping. Each stage settles a different decision. Skipping the blank check leaves you evaluating artwork without a confirmed garment; skipping the proof check leaves production working from an approval you have not properly reviewed.
Production takes 5–7 business days after proof approval, with shipping transit additional. For a 2026 event, count back from the date you need the garments, then allow for proof review and any sample stage. Do not treat the upload date as the production start date.
At final approval:
- Check the exact artwork version shown in the proof.
- Confirm the selected garment and color.
- Review every requested print location and dimension.
- Resolve corrections before approving production.
- Save the approved proof with your order brief.
Choose pickup or shipping around your release date
Decide how you will receive the order before announcing a firm merch handover date. For creators in Frisco and nearby DFW communities, free pickup gives you a local collection option. Production remains in Frisco; a Dallas or Plano audience does not imply a studio in those cities.
Sixplanets also supports nationwide US shipping, with transit additional to production. Neither route changes the 5–7 business-day production window after proof approval. Do not build an event plan around unconfirmed same-day or rush service.
Once the order is in your hands, check it against the approved brief before distributing shirts or photographing the release. Hand inspection is part of the studio's process, but your receiving check confirms that the order is ready for your particular launch.
Close the order with these practical checks:
- Choose free Frisco pickup or nationwide US shipping.
- Confirm collection arrangements or shipping details.
- Keep transit separate from the production window.
- Compare received sizes and quantities with your order record.
- Use the finished shirt for release photos and fit descriptions.
Compare ordering options for your creator drop
Choose an ordering approach based on the question you still need to answer. A sample resolves garment and placement decisions. A confirmed-size run organizes known requests. An event run serves a planned release but requires you to decide what to hold yourself.
None of these approaches proves demand or removes the need for artwork approval. For your 2026 launch, choose the smallest commitment that answers the current question, then make the next decision with that information.
| Option | Best for | Main advantage | Key limitation |
|---|---|---|---|
| Single custom sample | Creators checking fit and artwork | Lets you assess an actual printed shirt before a larger order | Adds a separate stage before the release run |
| Confirmed-size small run | Creators with collected buyer requests | Connects quantities to specific sizes and designs | Requires accurate records and buyer instructions |
| Event merch run | Creators preparing an in-person release | Gives you a defined order for the event | You must decide the unconfirmed stock quantities |
| Staged repeat orders | Creators releasing merch gradually | Lets each order reflect the next set of requests | Each order requires its own planning and production time |
Start your custom merch order
No minimums. Confirm your blank, review the artwork proof, and choose Frisco pickup or US shipping.
Start your orderCommon mistakes creators make with heavyweight merch
Treating heavyweight as a complete garment specification
The term does not settle fit, composition or dimensions. Ask for the exact blank and compare its size chart before describing the release to buyers. Otherwise, your product description promises a feel or silhouette you have not checked.
Approving the graphic without checking its placement
Correct artwork can still be approved in the wrong location or at an unintended size. Review the design on the proposed garment, not just as a standalone file. Keep requested placement changes in the written order record.
Turning audience interest into an unsupported size mix
A positive response to a design is not a set of garment instructions. Collect sizes from confirmed buyers where possible, and distinguish those requests from stock you choose to hold. No minimums give you room to keep those decisions separate.
Announcing the drop before accounting for proof approval
Production starts after approval, not when you first send the artwork. Include review time, the 5–7 business-day production window and shipping transit where relevant. A public release date should reflect the full sequence, not just printing.
Adding variants before checking the first shirt
More colors and layouts mean more specifications to review. Settle the first garment and artwork combination before expanding the order. A focused release is easier to describe clearly and check against the approved brief.
FAQ
What's the best way to order custom heavyweight t shirts for my first merch drop?
Confirm the exact heavyweight blank, review its size chart and approve the artwork proof before ordering the release run. Start with one sample if you still need to check fit or actual print placement.
Can I order just one custom shirt from Sixplanets?
Yes. Sixplanets offers custom DTF-printed apparel with no minimum order, so you can order one shirt before deciding on a larger merch run.
Does heavyweight mean the shirt has an oversized fit?
No. Heavyweight describes fabric weight, while the garment's cut and measurements determine fit. Check the exact blank's size chart before describing a shirt as oversized.
How long does custom shirt production take?
Production takes 5–7 business days after final artwork proof approval. Shipping transit is additional, so include it separately when planning your release date.
Can I pick up my creator merch in Frisco?
Yes. Free pickup is offered in Frisco, where production takes place. Confirm collection arrangements for your order rather than assuming immediate pickup.
Is an artwork proof the same as a printed sample?
No. An artwork proof lets you approve the proposed design and placement; a physical sample lets you assess the actual garment and print. Use each to answer the appropriate question.
What should I send when asking for help with merch artwork?
Send the intended artwork version, selected garment details and requested print locations. Explain which parts need help, then review and approve the final artwork proof before printing.
One last thing
Photograph the shirt you intend to sell, not just the design you intend to print. A digital mockup communicates the concept, but a finished sample lets you show the garment's actual shape and artwork placement.
Keep that sample with the approved proof and order brief. Together, they give you a reference for describing the drop and planning a repeat order. If you change the blank or artwork later, check the new version rather than treating it as the same shirt.