THE SIXPLANETS BLOG
Design a custom hoodie around its pocket and hood
Plan custom hoodie artwork around the pocket, hood and available print areas. Compare readable layouts before approving the studio proof.
By sixplanets · Published About 3 min read
In this guide
A hoodie has more moving parts than a T-shirt: a hood, drawcords, thicker fabric and sometimes a pocket or zip. A layout that fits a flat rectangular canvas can still collide with those features. Choose the hoodie first, then adapt the design to its actual construction.
Compare the blank before drawing the layout
Browse the hoodie collection and look at the front and back photographs, the available colors and the supplier description. Check whether the style is a pullover or a zip-up, and where the pocket and seams sit. The garment's fit and fabric are separate decisions from the printed artwork.
If a specific feature is important and not clear in the listing, ask the studio before ordering. Do not assume that a photographic reference for another style has the same pocket position or print area.
Keep the front clear of the pocket
On a pullover with a kangaroo pocket, the usable front artwork area needs to sit above the pocket. Start with a compact layout and check its bottom edge as well as its width. A tall design may need restructuring into a wider composition.
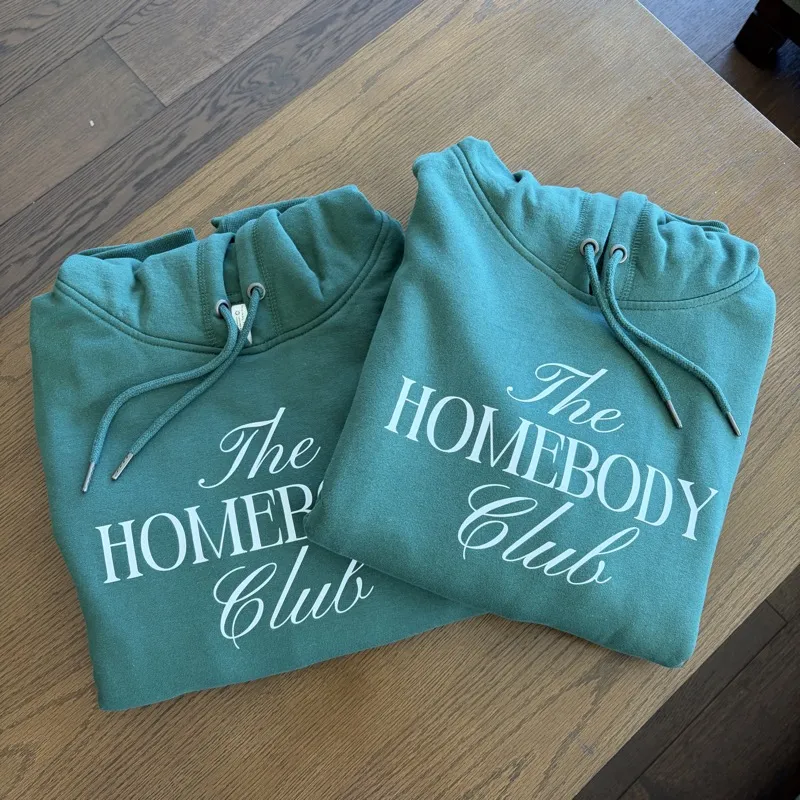
For example, a club name, illustration and small location line can become three clear layers. Adjust the illustration independently instead of shrinking the whole design until every letter becomes difficult to read. Do not position important lettering over a seam or assume that a print can bridge a zip.
Check what the hood covers on the back
A lowered hood can hide a high back print. A raised hood changes the view again. Decide whether the artwork needs to stay visible during everyday wear or whether the upper-back position is essential to the design.
Compare the garment's available back photograph and the labeled editing area. If the back photograph is missing, a layout reference cannot prove exactly how the hood falls. The studio proof is the point to confirm scale and positioning for the chosen blank.
Use contrast and readable lettering
Choose an ink color that remains distinct from the hoodie color. Similar dark tones can lose the edges of a logo; a pale line on a light blank can disappear. Look at the design as a whole and at the smallest details.
A thick, clear letterform often needs less space than a highly detailed mark with small supporting copy. Start with the important text, then decide whether the secondary line is necessary. A short design should communicate quickly when the garment is moving.
Keep sizes and locations separate
The editor's size quantities define how many garments you are ordering. Print locations define where artwork goes on each garment. Confirm both before review, and do not assume that selecting several sizes creates individual names or separate artwork for each person.
The price shown for each garment covers the print locations you choose. Use team ordering for a shared design across mixed sizes. Individual names, numbers or different artwork should be discussed through a quote so the studio can confirm the details.
Approve a proof that reflects the actual hoodie
- Verify the garment style and color.
- Check that the front artwork avoids pockets, zips and seams.
- Confirm how the hood affects the back design.
- Check the smallest lettering at the intended print size.
- Review all size quantities and selected print locations.
Production takes 5–7 business days after proof approval, with shipping transit additional. If you have a deadline, contact the studio for confirmed availability before ordering. Start by choosing a hoodie that suits the intended fit.